
In the world of accessories, a DIY earring holder is not just a practical solution; it’s a creative endeavor that allows you to showcase your favorite earrings in a personalized and charming way.
Imagine having a stylish and functional earring display that not only keeps your jewelry organized but also adds a touch of uniqueness to your space. Let’s dive into the world of DIY earring holders and explore the possibilities.
Contents
ToggleThe Need for Organization: Taming Earring Chaos
If you’re an earring enthusiast, you know the struggle of keeping your earrings organized. Pairs getting separated in the constant search for a matching set – it’s a familiar tale.
A DIY earring holder becomes the hero of your accessory collection, offering a simple yet effective solution to the chaos.
Repurposing Everyday Items: Creativity Unleashed
One of the beauty points of DIY earring holders is that they often involve repurposing everyday items, turning them into functional pieces of art.
Picture an old picture frame transformed into an earring display or a rustic window screen becoming a charming organizer. The possibilities are limited only by your imagination.
A Personal Touch: Customizing Your Earring Display
Creating your DIY earring holder allows you to infuse a personal touch into your accessory storage. Paint it in your favorite colors, add decorative elements, or incorporate inspirational quotes – the choice is yours. Your earring holder becomes not just a practical item but a reflection of your style and creativity.
Wall-Mounted or Tabletop: Tailoring to Your Space
DIY earring holders come in various styles, catering to different preferences and available space. Consider a wall-mounted holder if you’re short on tabletop space, or opt for a tabletop display if you want your earrings within arm’s reach. The flexibility of design ensures that your earring holder seamlessly integrates into your room.
Budget-Friendly Beauty: Crafting Without Breaking the Bank
The cost-effectiveness of creating a DIY earring holder is another compelling reason to embark on this creative journey.
You can often repurpose items you already have at home, minimizing expenses while maximizing style. It’s a budget-friendly way to enhance your accessory storage and home decor simultaneously.
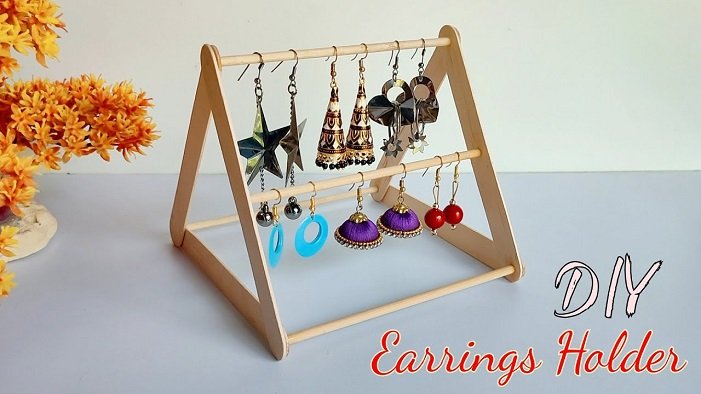
Step-by-Step DIY Earring Holder Guide
- Gather Your Materials: Collect items like an old frame, mesh fabric, or a wooden board, depending on your chosen design.
- Design Your Layout: Plan how you want your earrings to be displayed – whether hanging, pinned, or inserted into the material.
- Add Decorative Elements: If desired, paint the frame or add decorative elements to enhance the visual appeal.
- Secure Earrings in Place: Use hooks, wires, or even pushpins to secure your earrings onto the chosen material.
- Mount or Display: Depending on your design, either mount your earring holder on the wall or place it on a tabletop.
- Admire Your Handiwork: Step back and admire your newly crafted DIY earring holder, ready to showcase your beautiful collection.
Where to Find Inspiration: Exploring DIY Ideas
If you’re seeking inspiration for your DIY earring holder, the internet is a treasure trove of creative ideas. Platforms like Pinterest and DIY blogs feature countless designs and tutorials, ranging from the simple and chic to the elaborate and whimsical. Take a virtual stroll through these sources to find the perfect DIY earring holder for your style.
Read More:
Unveiling the Charm of Disco Ball Planters: [UPDATED] Guide
Conclusion
In conclusion, a DIY earring holder is more than just a practical solution; it’s an opportunity to infuse your space with creativity and style.
From repurposing everyday items to adding a personal touch, creating your earring holder allows you to enjoy a functional and aesthetically pleasing accessory display.
So, roll up your sleeves, gather your materials, and embark on the journey of crafting convenience with a DIY earring holder – where organization meets creativity in the most charming way.